BeaconPHP安装
BeaconPHP 的安装可以使用源码直接安装配置,也可以使用 composer 进行安装。
源码地址:
https://github.com/wj008/beacon-web
源码下载完成后 使用 composer install 安装依赖
 使用composer 安装:
composer create-project wj008/beacon-web

或者

php composer.phar create-project wj008/beacon-web
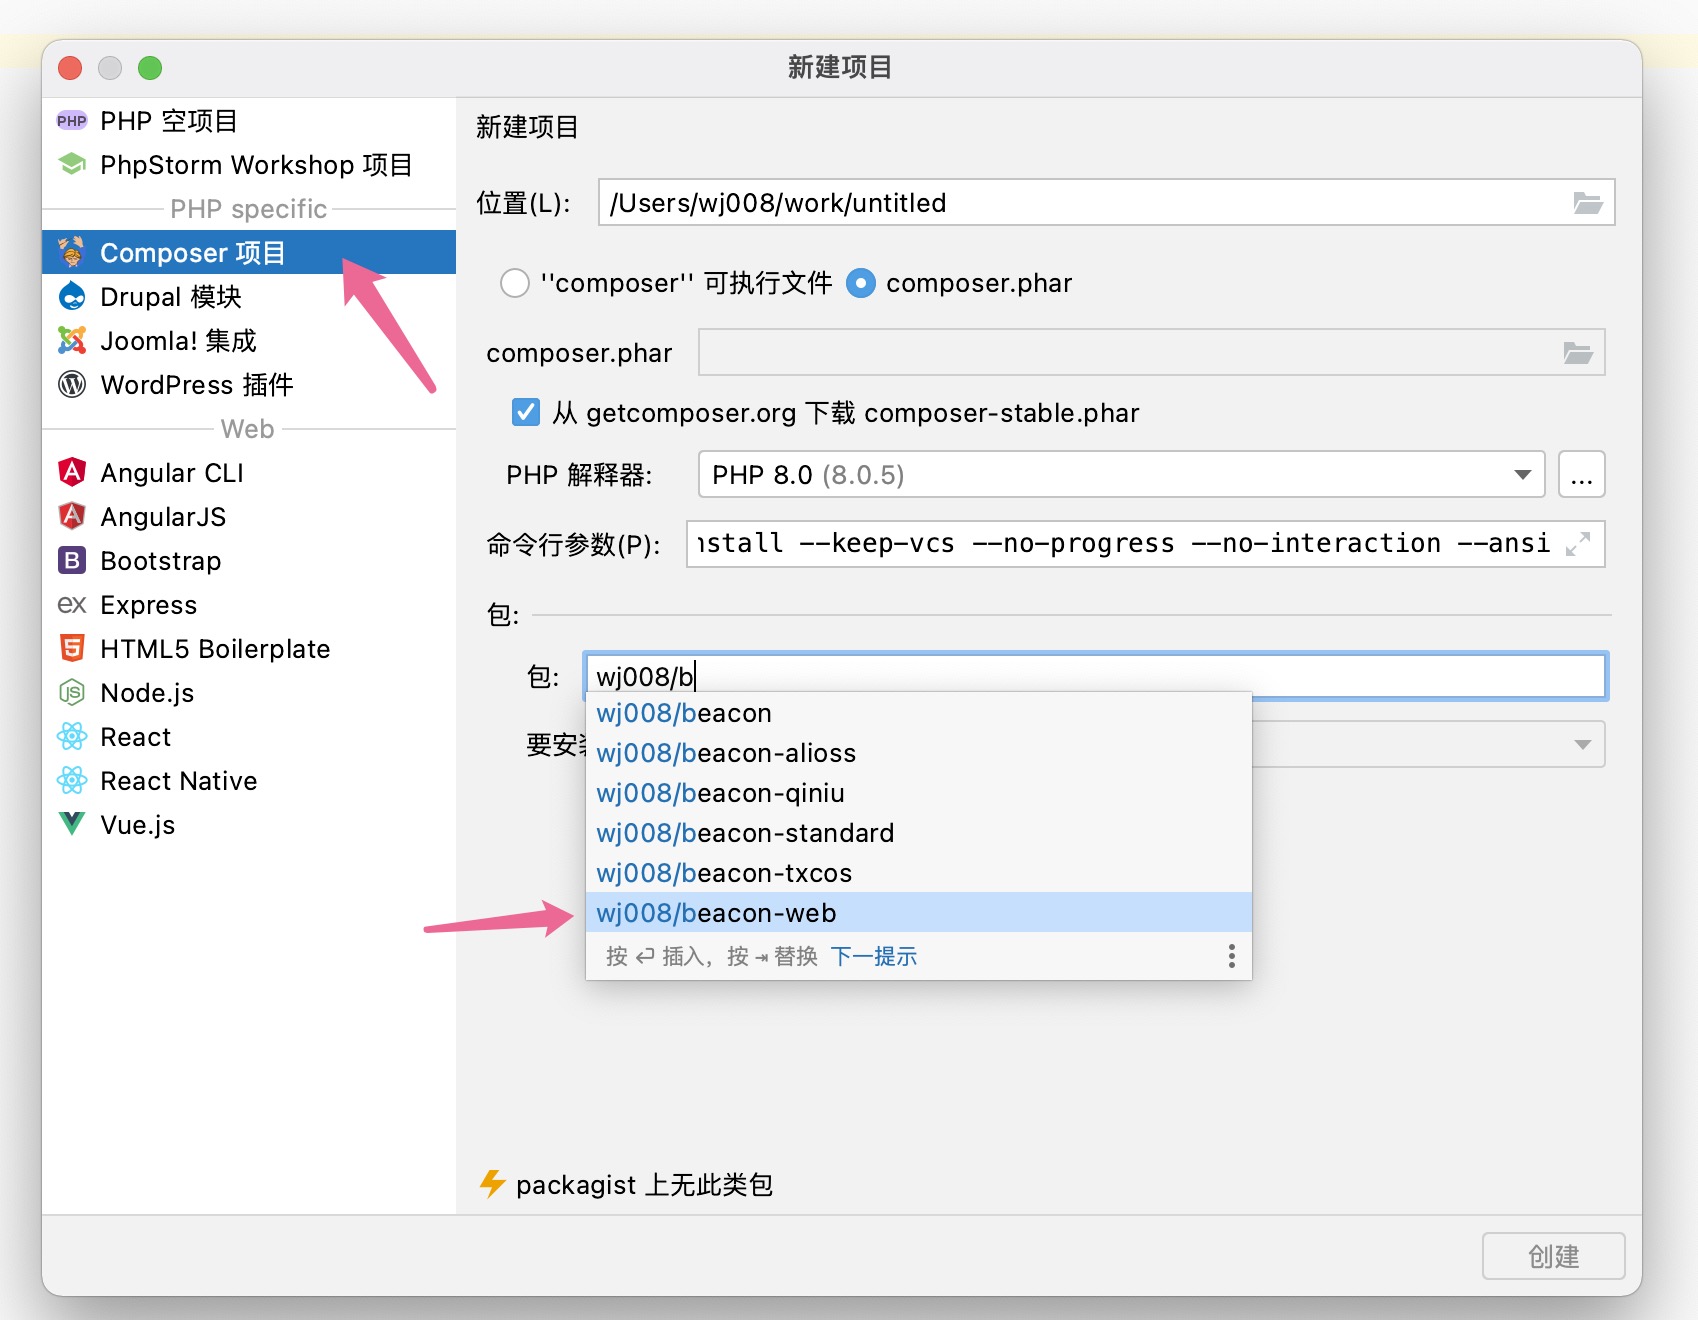
使用 phpstorm 安装:
phpstorm 创建工程时选择 composer 项目对话框底部项目搜索中搜索 wj008 选择 beacon-web 创建项目。
项目部署
需要设置 url 重写,指向 index.php 并且需要配置支持 PATH_INFO 变量。
网站目录应该指向 /www/index.php 是入口文件。
BeaconPHP 不支持二级目录站点配置。
以 nginx 为例
假如我们的 项目目录为
/works/php/beacon
域名为:www.beacon.com
server {
        listen       80;
        server_name  www.beacon.com;
        location / {
            root   /works/php/beacon/www;
            index  index.html index.htm index.php;
            if (!-e $request_filename){
              rewrite ^(.*)$ /index.php$1 last;
            }
        }
        error_page   500 502 503 504  /50x.html;
        location = /50x.html {
            root   html;
        }
        location ~ \.php(/.+)?$ {
            root    /works/php/beacon/www;
            set $path_info "";
            set $real_script_name $fastcgi_script_name;
            if ($fastcgi_script_name ~ "^(.+?\.php)(/.+)$") {
                set $real_script_name $1;
                set $path_info $2;
            }
            fastcgi_pass   127.0.0.1:9000;
            fastcgi_index  index.php;
            fastcgi_param SCRIPT_FILENAME /works/php/beacon/www$real_script_name;
            fastcgi_param SCRIPT_NAME $real_script_name;
            fastcgi_param PATH_INFO $path_info;
            include     fastcgi_params;
        }
    }